Thursday, August 30, 2018

Salted Mechanicus

I began a salting project for my Mechanicus Scenery a while ago and have progressed significantly with it offline. Today is therefore an update on this (rather large) project. 

I commenced the project by applying salt to random parts of my terrain in clumps and lumps all over the place. This was done by simply using water and salt (the water acting as a weak glue) over the base coat. The base coat here is black. However, I have used some silver spray paint to go over the black to provide a bit of a random look to the base coat in many places. This approach was deliberate in order to get a varied look from the salting technique at the end of the day.

The next step that I undertook was to grab my air gun and spray paint the Mechanicus terrain with green paint, followed by various highlights in grubby orange colours. The first image shows the result of this step.


The globs of salt can clearly be seen still stuck to the terrain at this point (check out the left hand panel of the railing in the image above in particular - but also the other two panels of the same railing and a few other bits that can also be seen in the image. 

To proceed, I took a strong toothbrush (and at one point, a needle) and started to chip away the salt that I'd scattered over the terrain. The purpose of this is to get rid of some of the sprayed on green and orange paint to reveal the black and silver base coat beneath. The next image shows what the terrain looks like after removing the salt.


With the salt off, the specks of black and silver start to show through. Its like the green paint (or decay?) has been chipped away to reveal some fresher metal beneath. Of course, we could have inverted this process by having something brown and rusted looked at the base coat layer -- chipping away the paint in this manner would reveal the brown rust layer beneath. That's also perfectly valid. Here I have simply chosen to do it this way to reveal the original metal beneath -- it still looks solid, but the terrain looks like it has been weathered, worn, and not seen too much attention recently, which was the look I was after.

Already at this stage, the chips showing through look realistic. However, I wanted to further enhance the look of the chips. I did this by carefully applying an edge of lighter green and in some places black to the outskirts of the chipped paint. The result of this is below.


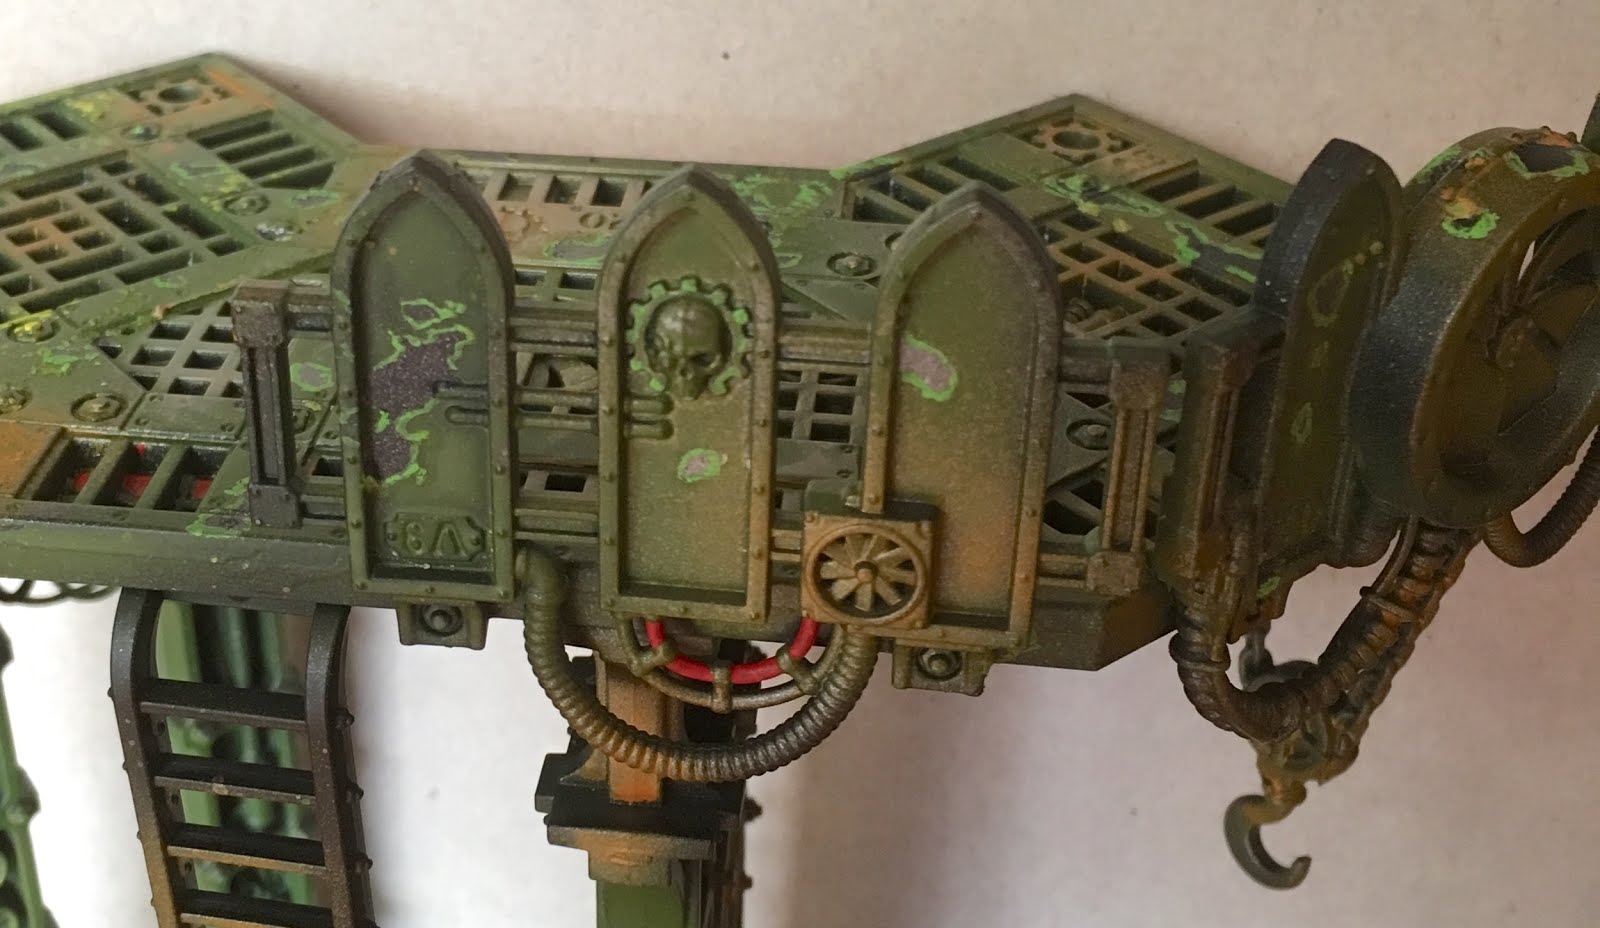
Overall this communicates a terrain piece that has been neglected for a long while and could do with a new lick of paint. As if that is going to happen in the underparts of some patulous hive city. 

There is still plenty of work to do on this terrain though. I want to pick out some of the cables (I started with a red on that connects the underside of the middle and right panel of the rail here) and get to work on splotching some muted yellows around the place to give it a muckier and more industrial look. So although the main work of the salting is now complete, there is plenty left to do with this project yet. 

Saturday, August 25, 2018

Full Lernaean Terminator Squad

I have finally completed assembling the full Lernaean Terminator Squad for the Alpha Legion. As readers will be aware, I bought a sixth body and extra parts to make best use of the left over bits from the kit (namely using the conversion beamer on one of the legionaries). Hence this squad is six and not five complete members. They are based on a mixture of parts that I had lying around that include the older style Imperial Ruins and Mechanicus terrain coupled with small rocks, cork and other assortments. Overall, I'm happy with the squad and now need to mix up a new batch of Alpha Legion air gun colour to use!


Monday, August 20, 2018

Lernaean Harrower with Power Fist

Having purchased an extra body for use with my Alpha Legion Lernaean terminator squad, I set about thinking what I wanted to do with it. The main goal was to use all the bits in the terminator squad, hence having the volkite right arm was a given for this model since the conversion beamer was used on another Lernaean

Looking through my (now several years old) review of the Lernaean squad, nothing particularly sprang out. Hence I decided to choose the tried and trusted power fist option! Although I might magnetise this as a chain fist later, the power fist is an ideal choice to kit out the Harrower with amongst all the other power axes. It gives the squad a little bit of extra kick in close combat and poses a threat to lighter vehicles. 

In addition to the power fist, I also ordered a couple of more bits: the extra shoulder pad (resin) being the most obvious, but also a plastic bare head. I liked this head since it is shaved. I might attempt an Alpha Legion tattoo on it in the style of Dynat when I paint it perhaps. Not too sure about that just yet. Moreover, this represents a slight move away from my nearly entirely "all helmeted" force thus far, and a nice change. As can be seen in the image below, I have also used one of the plastic decorative bases to go along with this Harrower.


The only issue I have with this conversion is that the leather bits on the upper edge of the power fist are different to the Alpha Legion parts. Explicitly, there appears to be metallic triangles that terminate the legion parts, whilst the plastic component doesn't have them. To be honest, I'm not so bothered about this since when painted up no one is particularly going to notice. Except for me, obviously!

Overall I really like the way that this conversion has come out - doubly so for the left handed power fist that is pointing along the line of sight that the head is looking in. Seems befitting for a Harrower to be orchestrating the battle to my eyes. 

Saturday, August 18, 2018

Conversion Beamer Lernaean Terminator

Its been a little while due to holidays, but getting back in to the swing of things now. This post is a quick update on the Lernaeans that I got when they were released a month or more ago now. One of the major choices surrounding this unit is whether to assemble them using the included conversion beamer. I know a lot of people will immediately say a big fat "no" to this idea. And to be candid, so did I initially.

However, I did want to see how it looked. Plus I actually wanted to have at least one miniature looking like the canonical Lernaean depicted in the literature and on Forge World's site. For the boxed set though, this means that there will always be left over parts unless I magnetize the parts. Having fiddled around with the arms, I decided against magnets here. Hence I decided to try to hunt down a spare body (etc.) for the remaining volkite arm and stumbled across Egg Head Miniatures in the UK. I snapped up the extra body (plus other bits to make up a sixth terminator) and used it here so that I would not have any bits left unused. Now, I know my readers will say why didn't I just use the conversion beamer on a master of the forge, or similar. And you would be right - it is a more logical and tactical choice. I come back again to the fluff side of things. I'm assembling this Lernaean this was because it is cool looking and canonical. 

Here, I have mounted the terminator on to one of the spare parts from a manufactorum kit I had lying around and decorated it with stones and cork to finish the effect. The terminator is looking down the barrel of the conversion beamer, lining up his next shot. The axe meanwhile is gripped near the top giving the miniature a dynamic pose and synchronising with the stride that he is taking. Overall, a pleasing build to make and a model that I am certainly happy to have in my collection. 
Related Posts Plugin for WordPress, Blogger...

Facebook

Sequestered Industries